Hey there! As an embroidery supplier, I've seen firsthand the magic that happens when kids get their hands on a needle and thread. Teaching embroidery to kids is not only a fun and creative activity but also a great way to develop fine motor skills, patience, and a sense of accomplishment. In this blog post, I'll share some tips and tricks on how to teach embroidery to kids, along with some of our awesome products that can make the learning process even more exciting.
Getting Started
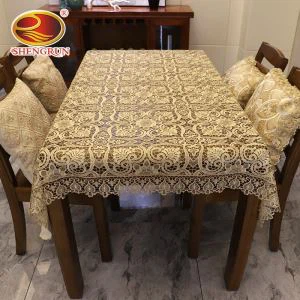
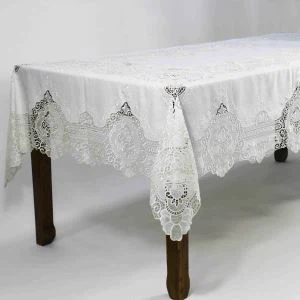
Before you start teaching embroidery to kids, it's important to gather the right supplies. You'll need embroidery floss, needles, fabric, and a hoop. You can find all these supplies at your local craft store or online. As an embroidery supplier, we offer a wide range of high-quality embroidery supplies, including Embroidery Table Place Mat Coasters, Luxury Gold Embroidered Lace Placemats - Eco-Friendly Vintage Dining Table Decor, and Antique Lace Placemats - Embroidered Table Linens & Teacup Cushions. These products are not only beautiful but also perfect for teaching kids embroidery.
Once you have all the supplies, it's time to choose a project. For beginners, it's best to start with a simple design, such as a heart or a flower. You can find free embroidery patterns online or create your own. Make sure the design is not too complicated and has large enough spaces for the kids to stitch.


Teaching the Basics
The first step in teaching embroidery to kids is to teach them how to thread the needle. Show them how to cut a length of embroidery floss and separate it into strands. Then, show them how to thread the needle and tie a knot at the end of the floss.
Next, teach them how to use the hoop. Explain that the hoop is used to keep the fabric taut and make it easier to stitch. Show them how to place the fabric in the hoop and tighten the screws to secure it.
Once the kids have mastered threading the needle and using the hoop, it's time to teach them the basic stitches. The most common stitches in embroidery are the running stitch, the backstitch, and the satin stitch. Start with the running stitch, as it is the easiest to learn. Show the kids how to bring the needle up through the fabric, then down through the fabric a short distance away. Repeat this process to create a line of stitches.
After the kids have mastered the running stitch, teach them the backstitch. The backstitch is a stronger and more durable stitch than the running stitch. To make a backstitch, bring the needle up through the fabric, then down through the fabric a short distance away. Then, bring the needle up through the fabric at the point where the previous stitch ended. Repeat this process to create a line of stitches.
Finally, teach the kids the satin stitch. The satin stitch is used to fill in large areas of the design. To make a satin stitch, bring the needle up through the fabric at one end of the area you want to fill. Then, bring the needle down through the fabric at the other end of the area, making sure the stitches are close together. Repeat this process until the area is filled.
Making it Fun
Teaching embroidery to kids can be a lot of fun, but it's important to make the learning process enjoyable. Here are some tips on how to make embroidery fun for kids:
- Choose fun projects: As mentioned earlier, choose projects that are simple and fun for the kids to do. You can also let the kids choose their own projects, as this will make them more interested in the activity.
- Use bright colors: Kids love bright colors, so use embroidery floss in a variety of colors to make the projects more exciting.
- Add embellishments: You can add beads, sequins, or other embellishments to the projects to make them more unique and fun.
- Make it a group activity: Invite other kids over to do embroidery together. This will make the activity more social and fun for the kids.
Safety First
When teaching embroidery to kids, it's important to keep safety in mind. Here are some safety tips to follow:
- Use blunt needles: Blunt needles are less likely to cause injuries than sharp needles. Make sure the kids use blunt needles when doing embroidery.
- Supervise the kids: Always supervise the kids when they are doing embroidery. This will help prevent accidents and ensure that the kids are using the supplies correctly.
- Keep the supplies out of reach: When the kids are not using the embroidery supplies, make sure they are stored in a safe place out of reach of children.
Conclusion
Teaching embroidery to kids is a fun and rewarding activity that can help them develop fine motor skills, patience, and a sense of accomplishment. By following the tips and tricks in this blog post, you can make the learning process enjoyable and easy for the kids. And if you're looking for high-quality embroidery supplies, be sure to check out our products, including Embroidery Table Place Mat Coasters, Luxury Gold Embroidered Lace Placemats - Eco-Friendly Vintage Dining Table Decor, and Antique Lace Placemats - Embroidered Table Linens & Teacup Cushions.
If you're interested in purchasing our embroidery supplies or have any questions about teaching embroidery to kids, please don't hesitate to contact us. We'd love to hear from you and help you get started on your embroidery journey.
References
- "Embroidery for Beginners: A Step-by-Step Guide" by Jane Smith
- "Teaching Kids Embroidery: Tips and Tricks" by Sarah Johnson
- "The Complete Book of Embroidery" by Mary Thompson