Hey there! As a Canvas Fabric supplier, I've had my fair share of customers asking about how to add borders to objects in Canvas Fabric. It's a pretty common question, and I'm here to break it down for you in a super easy way.
First off, let's talk about why you might want to add borders to your canvas fabric objects. Borders can add a touch of style, make your design stand out, or even help define different sections of your work. Whether you're working on a small craft project or a large-scale art piece, borders can really take your creation to the next level.


Tools You'll Need
Before we jump into the process, let's go over the tools you'll need. You don't need a whole bunch of fancy stuff, just the basics:
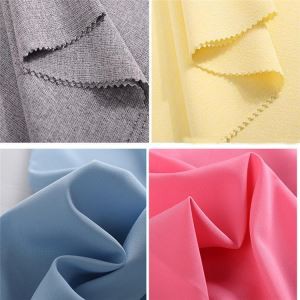
- Canvas Fabric: Of course, you need the fabric itself. We offer a wide range of canvas fabrics, like the Waterproof Dyed Fabric, which is great for outdoor projects or anything that might get wet.
- Scissors or a Rotary Cutter: To cut your fabric and any border materials.
- Thread and Needle or a Sewing Machine: Depending on your preference and the type of border you're adding.
- Measuring Tape or Ruler: To get your measurements right.
- Pins: To hold everything in place while you sew.
- Border Material: This could be a different type of fabric, ribbon, lace, or even a decorative trim. For example, if you're going for a more rustic look, you might choose a burlap trim.
Measuring and Cutting
The first step is to measure your object and decide how wide you want your border to be. A good rule of thumb is to make the border about 1 - 2 inches wide, but it really depends on your personal style and the size of your object.
Once you've decided on the width, measure and cut your border material. Make sure to cut it a little longer than the perimeter of your object to account for any seams or overlaps. If you're using a rectangular piece of canvas, you can measure the length and width and then calculate the total perimeter.
For example, if your canvas is 10 inches by 12 inches, the perimeter would be (10 + 12) x 2 = 44 inches. So, you'd want to cut your border material to at least 46 - 48 inches to be safe.
Attaching the Border
Now comes the fun part - attaching the border to your canvas fabric object. There are a few different ways to do this, depending on the type of border and the look you're going for.
Sewing the Border
If you're using a fabric border, sewing is a great option. You can use a sewing machine or sew by hand. Here's how to do it:
- Pin the border to the edge of your canvas fabric, right sides together. Make sure the edges are aligned and the border is evenly spaced around the object.
- If you're using a sewing machine, set it to a straight stitch and sew along the edge of the border, about 1/4 inch from the edge. If you're sewing by hand, use a running stitch or a backstitch to sew the border in place.
- Once you've sewn all the way around the object, trim any excess fabric from the edges.
- Fold the border over to the back of the canvas fabric and press it down. You can sew it in place again to secure it, or you can use a fabric glue if you prefer.
Using Fabric Glue
If you don't want to sew, fabric glue is a great alternative. It's quick and easy, and it works well for lightweight borders like ribbon or lace. Here's how to use it:
- Apply a thin layer of fabric glue to the back of the border material.
- Press the border onto the edge of the canvas fabric, making sure it's evenly spaced and aligned.
- Use a ruler or a straight edge to smooth out any wrinkles or bubbles.
- Let the glue dry completely before handling the object.
Adding a Decorative Trim
If you're using a decorative trim, like a beaded trim or a sequined trim, you can attach it using a combination of sewing and glue. First, sew the trim to the edge of the canvas fabric using a small stitch. Then, apply a little bit of fabric glue to the back of the trim to secure it in place.
Finishing Touches
Once you've attached the border, you can add some finishing touches to make it look even better. You can use a fabric paint or a marker to add some details or designs to the border. You can also add some beads or sequins for a little extra bling.
Another option is to use a fray stop or a fabric sealant to prevent the edges of the border from fraying. This is especially important if you're using a fabric that tends to fray easily, like a cotton canvas.
Different Types of Borders
There are so many different types of borders you can add to your canvas fabric objects. Here are a few ideas to get you started:
- Ribbon Border: A simple ribbon border can add a touch of elegance to your project. You can choose a ribbon in a coordinating color or a contrasting color for a more bold look.
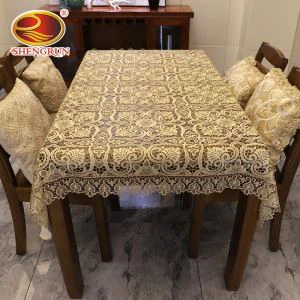
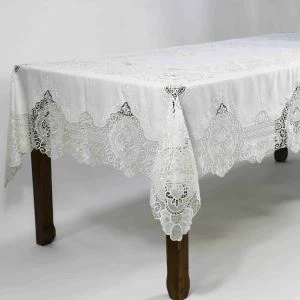
- Lace Border: Lace is a classic choice for a border. It adds a romantic and feminine touch to any project. You can use a delicate lace for a more subtle look, or a bold lace for a more dramatic effect.
- Braid Border: A braid border can add a rustic or ethnic look to your project. You can choose a braid in a natural fiber like jute or cotton for a more earthy feel, or a synthetic braid for a more modern look.
- Beaded Border: A beaded border is a great way to add some sparkle and shine to your project. You can use beads in different colors and sizes to create a unique and eye-catching design.
Tips and Tricks
Here are a few tips and tricks to help you add borders to your canvas fabric objects like a pro:
- Test Your Border Material: Before you attach the border to your canvas fabric, test it on a small piece of scrap fabric to make sure it looks good and that it doesn't bleed or fade.
- Use a Template: If you're adding a complex border design, it can be helpful to use a template. You can draw the design on a piece of paper or use a printable template from the internet.
- Take Your Time: Adding a border to your canvas fabric object takes time and patience. Don't rush it, and make sure you take the time to measure and cut everything accurately.
- Have Fun: Remember, adding a border to your canvas fabric object is a creative process. Have fun with it, and don't be afraid to try new things.
Conclusion
Adding borders to your canvas fabric objects is a great way to add some style and personality to your projects. Whether you're a beginner or an experienced crafter, it's a relatively easy process that can make a big difference in the final look of your work.
As a Canvas Fabric supplier, we're here to help you find the perfect fabric and border materials for your projects. We offer a wide range of high-quality canvas fabrics, like the Cotton Canvas Fabric Printing and the Wholesale Tc 65/35 Hospital Dyed Pocketing Fabric Manufacturer.
If you have any questions or need help choosing the right fabric or border materials, don't hesitate to reach out. We're always happy to help you with your creative projects. Whether you're working on a small craft or a large-scale art piece, we can provide you with the materials and guidance you need. Contact us to start your next project and take your canvas fabric creations to the next level!
References
- Fabric Crafting Basics: A Guide to Different Techniques
- Sewing for Beginners: Tips and Tricks for Success
- Decorative Borders: Ideas and Inspiration for Your Projects